
About the project
The DARE District Virtual Tour is a multi user virtual reality experience created to preview Algonquin college's new $44.9 million building project during its construction. The building will feature the college's new library, expands the college's specialized education and training facilities, and house the new Institute for Indigenous Entrepreneurship. Developed by a team of six: four alumni (two artists, and two programmers), and two coordinators/professors of the college's Game Development program. The project features the entire district in a 90,000 square foot, multi user, virtual reality environment. All in photo-realistic detail. The experience includes interactive elements such as writing on whiteboards, a mini game, annotation tools, a functioning elevator, and tools for a user guided tour.
The project was showcased on multiple occasions in it's alpha state. Here are some of the events, all based in Ottawa ON:
Applied Research Day - Innovation Center, Bayview Yards
Orientation Day - Algonquin College
MOST21 Mobilization Day - Canadian Aviation & Space Museum
President's Breakfast - Algonquin College
Academic Forum for Guidance Counsellors - Algonquin College
ASCC Conference 2017 - Château Laurier
The tour was also shown on many occasions in our project lab to faculty and guests at the college.
My role
My role was 3D Technical Artist. My duties included the following:
Stress testing assets in VR
Create assets from scratch, referencing the architectural plans
Collaborate with the team to develop the most efficient pipeline
Contact the Architects, Interior Designers, and 3D Designers involved in the building project in order to:
Keep documents up to date. Typically of layouts, finishes, and furniture
Identify missing or incomplete geometry
Receive new or updated 3D files
Collaborate in VR to scrutinise the accuracy of the project
Importing assets from their native formats; Revit, SketchUP, AutoCAD, or Rhino3D, into 3ds Max and optimising them for real-time
Creating textures to mimic the material sample boards
Test and adjust photometric lighting solutions in 3ds Max
Use various UV mapping techniques and prepare assets for baking
Bake light and shadow information into textures
Process baked textures in Photoshop. IE: adjusting curves, consolidating into texture atlases, eliminating seams, etc
I committed over 1100 hours for this 18 week project.
Zofia Jurewicz president of the architecture firm, left, analysing the project in VR with my collegue Ali Monette, right, as I go through architectural plans in order to ask questions and take notes.
Development
In the early stages of development we determined real-time lighting would not be viable for the performance and the photo-realism that we wanted, so we opted to do baked lighting using 3ds Max. This completely dictated the course of development and the techniques and conventions created to service our workflow.
We began by convert the 3D assets from their native file formats into 3ds Max files, then divided them into seperate files containing large sectors: 1st Floor, 2nd Floor, etc. These sectors would serve as master files, each master file was then further divided into sub sectors. The building was exported via its sub sectors, which totaled at 50.
Once the 3D assets were organised we began to optimise them, taking the overall poly count from about 60 million to just under 1 million. A high percentage of the geometry was rebuilt due to its mesh not being compatible with the Editable Poly workflow, or it was just easier to rebuild it rather than clean it up.
At the same time we started to test different lightning solutions and determined both a pixel per square meter target, and time efficient render settings. These tests went on for many weeks, which involved us monitoring a handful of computers that we kept rendering 24/7. The pixel per square meter target allowed us to properly divide the UV space for our texture atlases. Baking the lighting information into our textures went on from mid July until late October; we did approximately 700 individual bakes.
We created all of the textures, furniture, and trade fixtures from scratch. Referencing material sample boards, renders, and modern areas of the college campus.
Over the course of the project the architects and interior designers made many changes to the building which we anticipated and followed up on.
Some of my work
Here are some 360° images that show certain areas of the building that could be explored in virtual reality. If you're curious to see more of these and get a sense of the scale of the project, follow the link below.
For more 360° images of the IELC building, click here.
Menu system
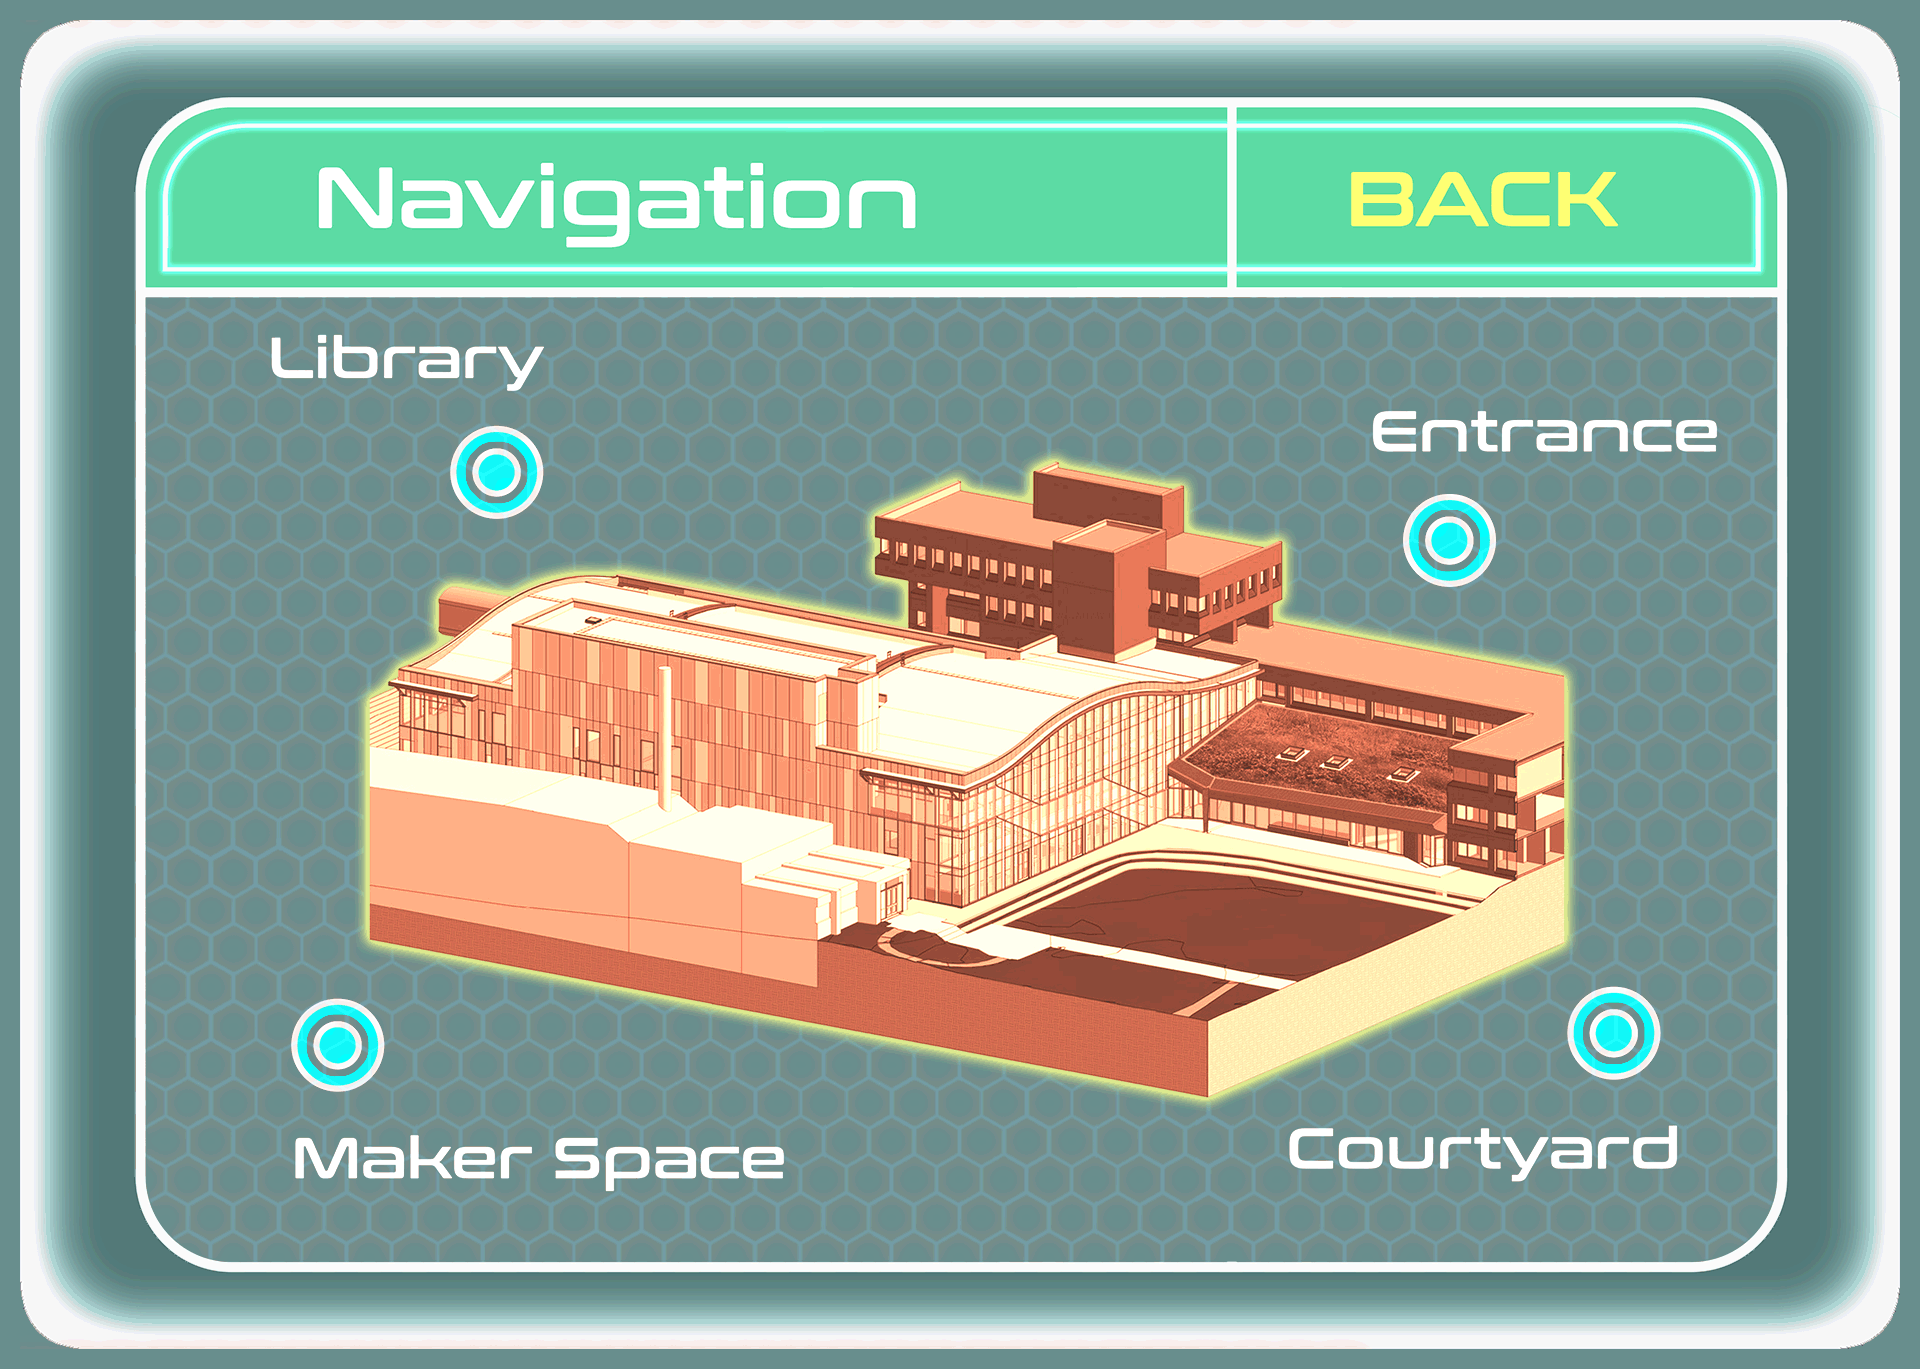
I created all of the assets required for the in game menu system. The menus were attached to the users controllers, they were projected on a thick piece of glass with rounded edges; the white glowing contours in this image represent the silhouette of the glass.
This menu in particular was used to teleport around the environment by selecting one of the four major locations.
Floating Geometry
I made floating geometry that we propagated throughout the environment, some of them are placed exactly where they would be according to the design plans. This made the experience much more realistic looking without effecting the poly count too much.
These were created using photos of existing trade fixtures within the college.
Herringbone Floor
The herringbone floor is one of many Indigenous elements incorporated into the building. It points true north and features a complex weaving pattern.
I created the textures for this floor completely from scratch using my own method. It reflects the design plans down to each tile, here are a few examples of the final textures with light information baked in. There was a total of 38 unique floor textures that fit seamlessly together.
Floor 1 herringbone pattern